Installing QGIS & GeoE3
Learning objective
By the end of this page you'll have a working QGIS install with the GeoE3 plugin enabled and visible in the toolbar.
GeoE3 runs inside QGIS as a regular plugin, so there's nothing to compile or configure beyond what's covered here.
Installing QGIS
- A recent QGIS 3.x install (QGIS 3.28 or later is recommended).
- Internet access the first time you run an analysis, since several processing steps fetch open data (OpenStreetMap, population rasters, humanitarian data) on demand.
- Enough disk space for your study area's working files (national-scale analyses can use several gigabytes).
Installing the plugin
Follow the steps below to install the GEOE3 QGIS plugin.
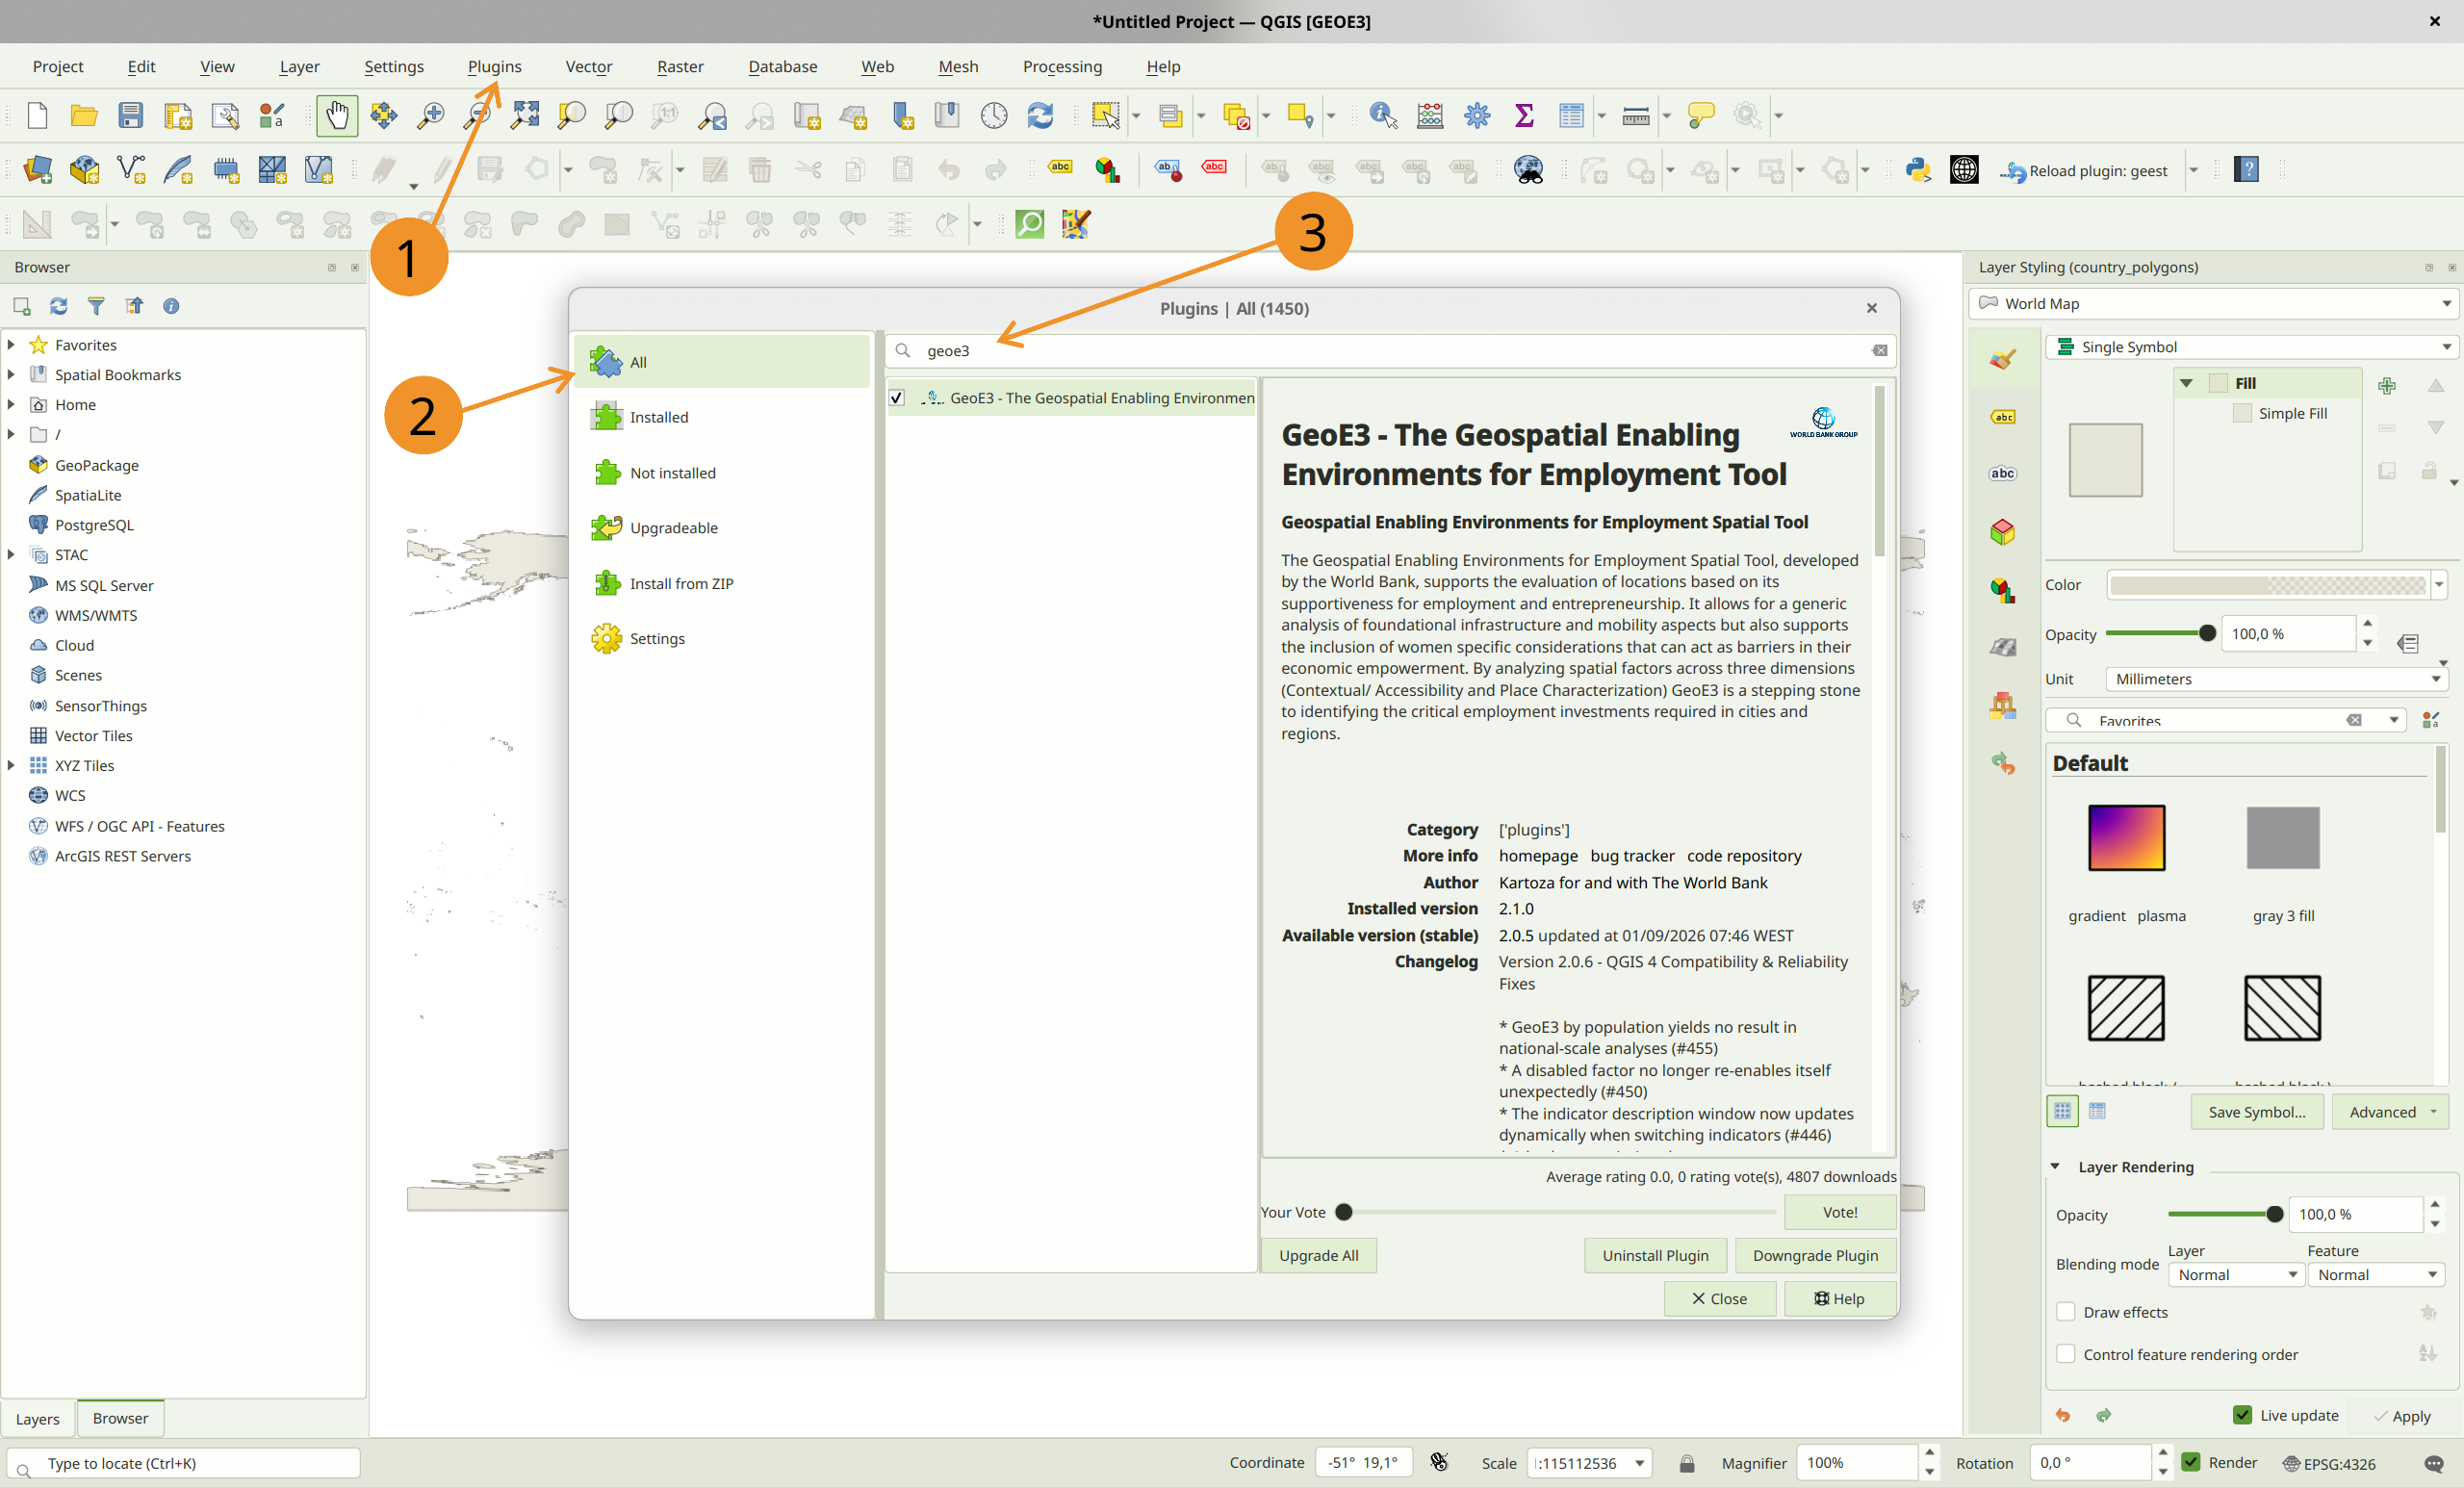
Step 1: Open the Plugin Manager in QGIS
- Launch QGIS.
- Go to Plugins > Manage and Install Plugins….
Step 2: Install the Plugin
- In the Plugin Manager window, select the All tab in the Plugin Manager.
- Search for
GEOE3.
- Select the plugin and click Install Plugin.
Step 3: Verify the Installation
- After installation, check the QGIS toolbar for the new GEOE3 icon Show/Hide GEOE3 Panel.

Recap
- GeoE3 is a regular QGIS plugin, installed from the Plugin Manager. Search for GEOE3 under the All tab.
- A toolbar icon and a dockable panel appear once it's installed and enabled.
Next: The Interface, opening the plugin, creating your first project, and getting oriented in the model tree.