Installation (Windows server)
Install the Metadata Editor and FastAPI service on Windows Server with IIS, MySQL/MariaDB, and optional background services.
Before you start: Installation overview · After install: Post-install configuration
IIS on Windows 10/11 Pro — same steps apply; enable IIS and required features via “Turn Windows features on or off.”
System requirements
| Component | Requirement |
|---|---|
| PHP | 8.2+ (Non-Thread Safe x64 for IIS) |
| MySQL / MariaDB | 8.x / 10.x+ |
| Python | 3.11+ (Conda recommended for FastAPI service) |
| IIS | 10+ with URL Rewrite; PHP Manager for IIS optional |
| NSSM | For FastAPI service and background worker (production) |
Step 1: Install PHP
- Download PHP 8.2+ NTS x64 from windows.php.net.
- Configure via PHP Manager for IIS or manual
php.ini. - Enable extensions:
extension=mysqli
extension=xsl
extension=openssl
extension=curl
extension=mbstring
extension=zip- Recommended settings:
memory_limit = 528M
max_execution_time = 300
post_max_size = 2000M
upload_max_filesize = 2000M
Install IIS URL Rewrite: https://www.iis.net/downloads/microsoft/url-rewrite
Step 2: Install MySQL
- Install MySQL from dev.mysql.com/downloads/mysql.
- Set and record the root password.
- Create database and user (Workbench or CLI):
CREATE DATABASE metadata_editor;
CREATE USER 'editor_user'@'localhost' IDENTIFIED BY 'your-secure-password';
GRANT ALL PRIVILEGES ON metadata_editor.* TO 'editor_user'@'localhost';
FLUSH PRIVILEGES;
Step 3: Folder layout and source code
Create:
C:\inetpub\metadata-editor\
├── editor\          ← Metadata Editor (index.php)
└── fastapi\         ← FastAPI service
Download from GitHub (ZIP or clone):
- metadata-editor →
editor\ - metadata-editor-fastapi →
fastapi\
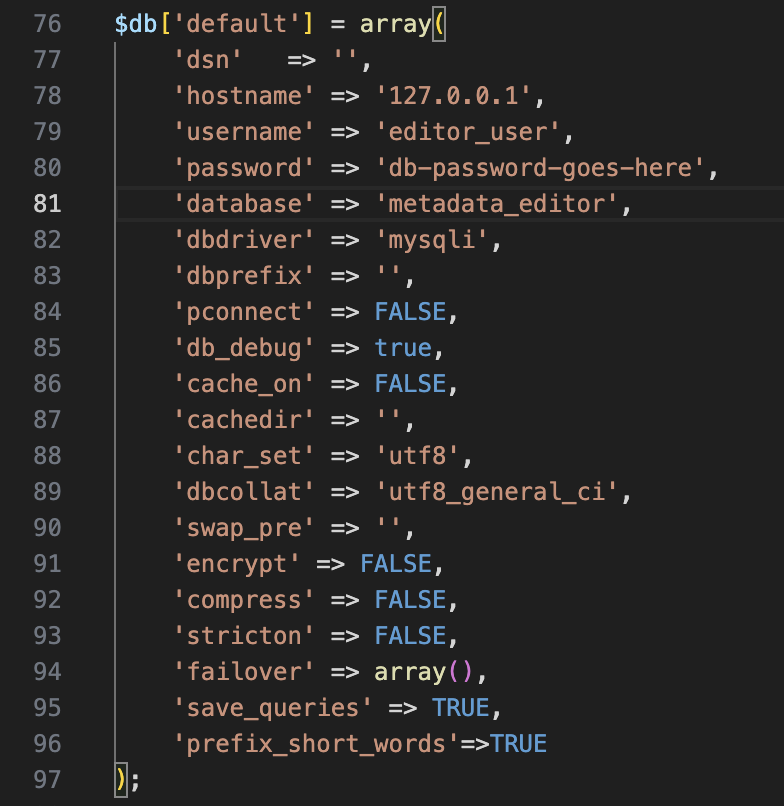
Step 4: Configure Metadata Editor
- Copy
editor\application\config\database.sample.phptodatabase.php. - Edit credentials:
$db['default'] = array(
	'hostname' => 'localhost',
	'username' => 'editor_user',
	'password' => 'your-secure-password',
	'database' => 'metadata_editor',
	// ...
);
- Permissions — grant the IIS app pool identity Modify on:
editor\datafiles\editor\files\editor\logs\
Step 5: Configure IIS
- Open IIS Manager.
- Create a site or application pointing to
C:\inetpub\metadata-editor\editor(theeditorsubfolder, not the parent). - App pool: No Managed Code, Integrated pipeline.
- Ensure URL Rewrite routes requests to
index.php(standard CodeIgniter/front-controller pattern). The editor root includesweb.configfor this.
For optional clean URLs (hide index.php in the browser), see Clean URLs.
Handler mapping and PHP on IIS: PHP installation (IIS).
Step 6: Web installer
- Browse to your site URL (e.g.
http://localhost/orhttp://localhost/metadata-editor/). - Fix any failed prerequisite checks.
- Run Install Database and create the Site Administrator account.
Step 7: FastAPI service
Follow Install and configure the FastAPI service:
fastapi\.envwithSTORAGE_PATH=C:\inetpub\metadata-editor\editor\datafiles- Conda or
.venv+pip install -r requirements.txt - Test:
start.bat -fthen openhttp://127.0.0.1:8000 - Production: Run the FastAPI service — Windows using
fastapi\deploy\windows\install-service.bat
Do not bind the FastAPI service to 0.0.0.0 on untrusted networks. Do not use --reload in production.
Step 8: Background worker (optional)
The Metadata Editor works without this service. Enable for batch jobs or API automation.
From elevated PowerShell, with $AppRoot = the folder that contains index.php (the editor root):
cd C:\inetpub\metadata-editor\editor\deploy\windows
.\install-service.ps1 -AppRoot "C:\inetpub\metadata-editor\editor"
Verify:
Get-Service metadata-editor-worker
Get-Content C:\inetpub\metadata-editor\editor\logs\worker.log -Tail 20
Details: Jobs and background workers.
Step 9: Post-install
Complete Post-install configuration — data_api_url, storage paths, SMTP, smoke tests, backups.
Troubleshooting
| Issue | Check |
|---|---|
| PHP extensions missing | php.ini; restart IIS |
| Database connection error | database.php; MySQL service running |
| Permission denied | IIS app pool identity on datafiles, files, logs |
| Data import fails | FastAPI service; .env STORAGE_PATH; Post-install smoke tests |
| Worker service wrong path | -AppRoot must be editor\ (where index.php lives), not the parent metadata-editor folder |