2. Getting Started with Facebook Marketing API
2.1. The Web Interface
Exploring the Web Interface is the first thing to understand: the Facebook Marketing API and what you can get from it. For that, all that you need is a Facebook account. As Facebook is continually changing its design, we recommend you access the Web Interface of the Marketing API by clicking on this link: https://www.facebook.com/adsmanager/creation.
You will probably have to answer some questions on how do you want to use the Marketing API. Don’t worry too much about your answers, as any answer you give will lead you to a screen like this one:
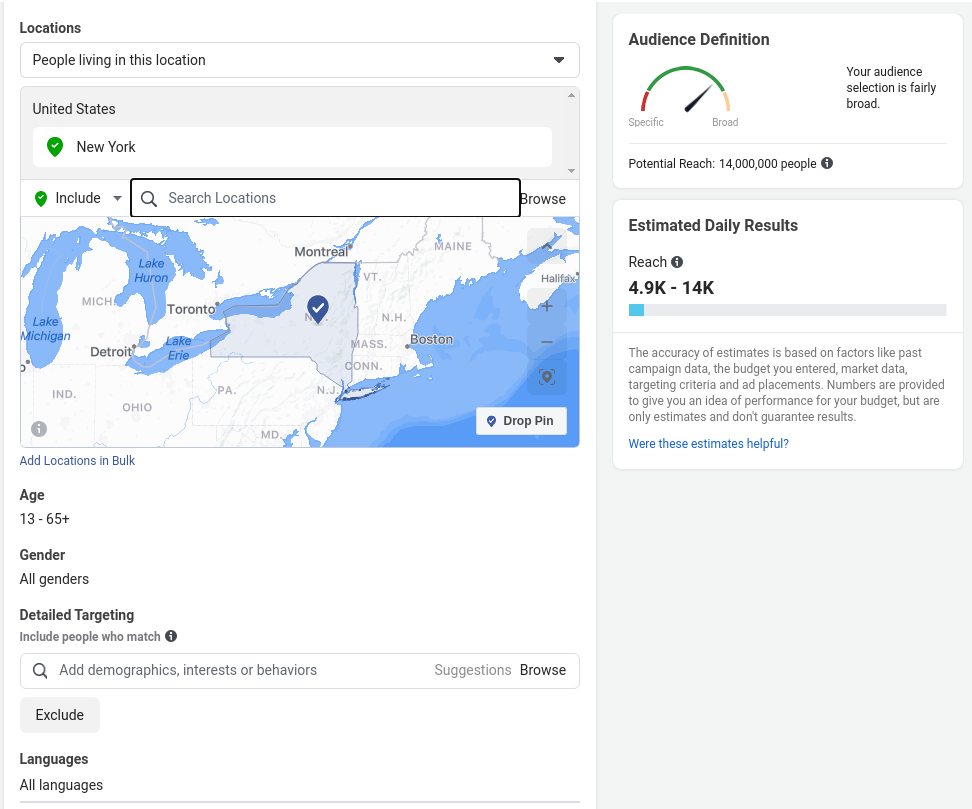 You might want to play with the interface a little bit to get used to it. In the example above, Facebook Marketing API is telling us that if we were to start a marketing campaign right now in New York state, potentially the campaign would be seen by 14M people, according to the campaign parameters set by us: in this case, males and females aged 13 years old or more.
With a few modifications, we can get the estimated number of female Facebook users aged from 20 to 60 years old in the state of New York that primarily access Facebook using Wifi connection and work in the Business and Finance industry, as illustrated in the figure below:
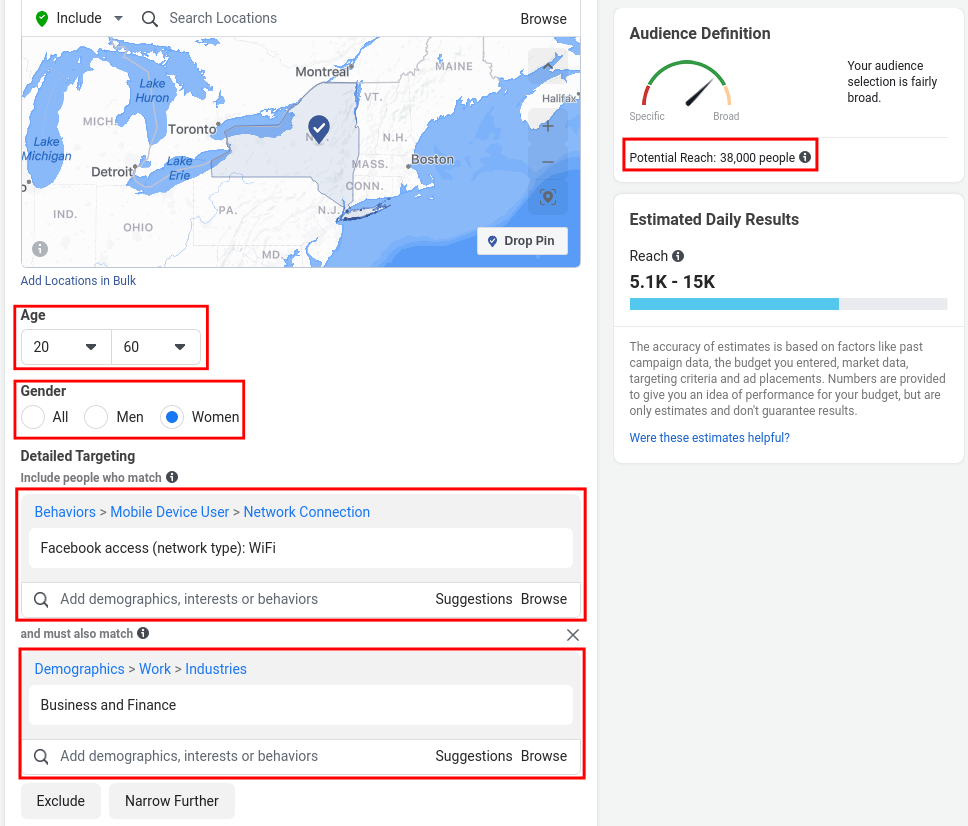
A part of the attributes available for a campaign is self-declared (e.g., education, relationship); FB automatically infers others (e.g., access device, browser, connection). Again, playing with the interface would help you to select what is important for your use case.
2.2. PySocialWatcher
Once the data attributes are defined using the Web Interface, we can use a tool called PySocialWatcher to collect the data automatically. This tool is free to changes and can be obtained on GitHub. The implementation of pySocialWatcher started by Matheus Araujo while working at Qatar Computing Research Insitute under Ingmar Weber’s supervision. In order to install PySocialWatcher in your system, we can use the following commands:
git clone https://github.com/maraujo/pySocialWatcher.git
cd pySocialWatcher
pip install -r requirements.txt
python setup.py install
Note
Currently, a fork from the original repository was made by Joao Palotti with several improvements, including Python 3 support and other utilities for creating and post-processing the collection. We highly recommend using Joao’s fork instead of the original, while these modifications are not merged back to the original repository. In order to install it, we just need to change the first command from the code snippet above:
git clone https://github.com/joaopalotti/pySocialWatcher
cd pySocialWatcher
pip install -r requirements.txt
python setup.py install
Once pySocialWatcher is installed in your system, you will need to obtain an access token from Facebook to start your automatic data collection. Once a token is obtained, we can begin our first data collection.
References:
Matheus’s pySocialWatcher – Original Repository
Joao’s pySocialWatcher – Repo with the latest features used in this tutorial.